
はじめに
今回は「Notionに貯めた情報をDifyに自動で登録できたら便利じゃない?」ということで、GAS(Google Apps Script)を使ってそれを実現してみました。
結論から言うと、思ったより簡単にできました!
この記事では、その手順とポイントをわかりやすくまとめています。
環境(使ったもの)
- Notion(社内ナレッジ用)
- Google Apps Script(GAS)
- Dify(生成AIアプリ基盤)
事前準備
-
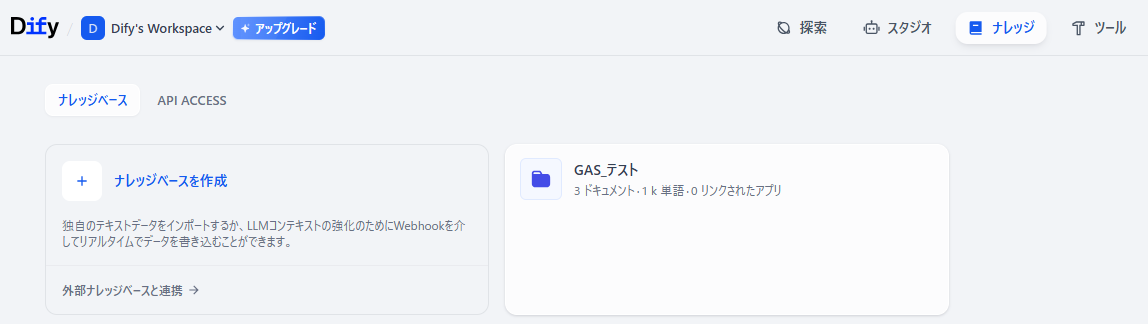
Difyのナレッジベース
-
今回は「GAS_テスト」という名前で作成しています。
-
今回は「GAS_テスト」という名前で作成しています。
-
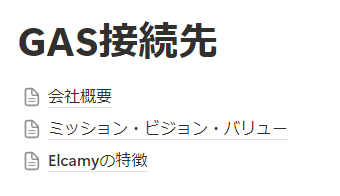
Difyのナレッジベースに登録したいコンテンツをまとめたNotionページ
-
今回は「GAS接続先」というページに3つの子ページを作成しています。
-
今回は「GAS接続先」というページに3つの子ページを作成しています。
本編
やりたいこと
以下のような流れで、Notionページの情報をDifyのナレッジベースに登録していきます。
graph LR
	1.Notionインテグレーションの設定
	-->2.NotionページIDをCSVに保存
	-->3.Notionページからコンテンツを取得
	-->4.Difyナレッジに登録
手順
- Notionインテグレーションの設定
- NotionページIDをCSVに保存
- Notionページからコンテンツを取得
- Difyナレッジに登録
Step 1:Notionインテグレーションの設定
まず、GASからNotionにアクセスするための準備をします。
GASがNotionに接続するためには、Notionのインテグレーションを設定する必要があります。
-
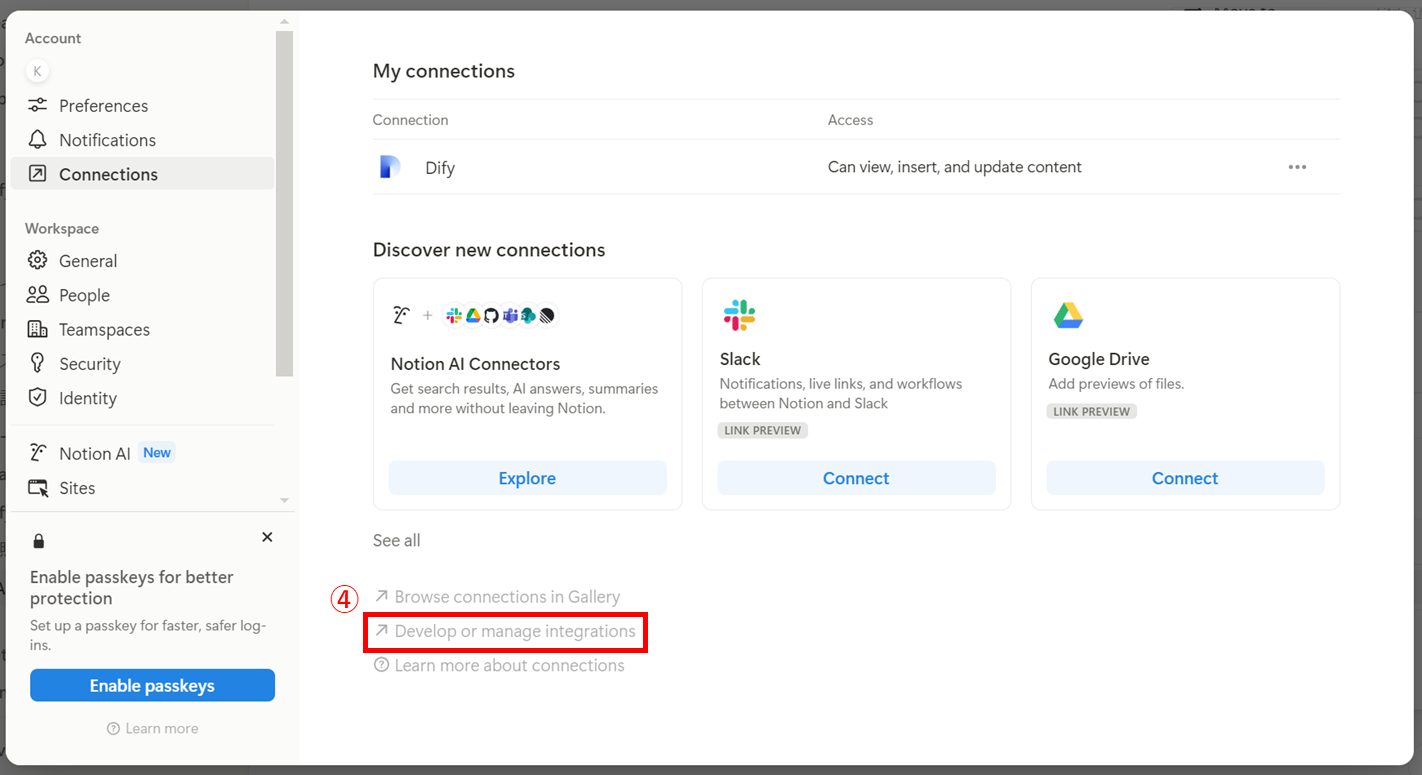
インテグレーションの管理ページに移動します。
-
次に、インテグレーションの設定を行います。
今回はNotionページの「コンテンツを読み取る」機能だけで問題ありません。
「内部インテグレーションシークレット」はGASから接続する際に必要となります。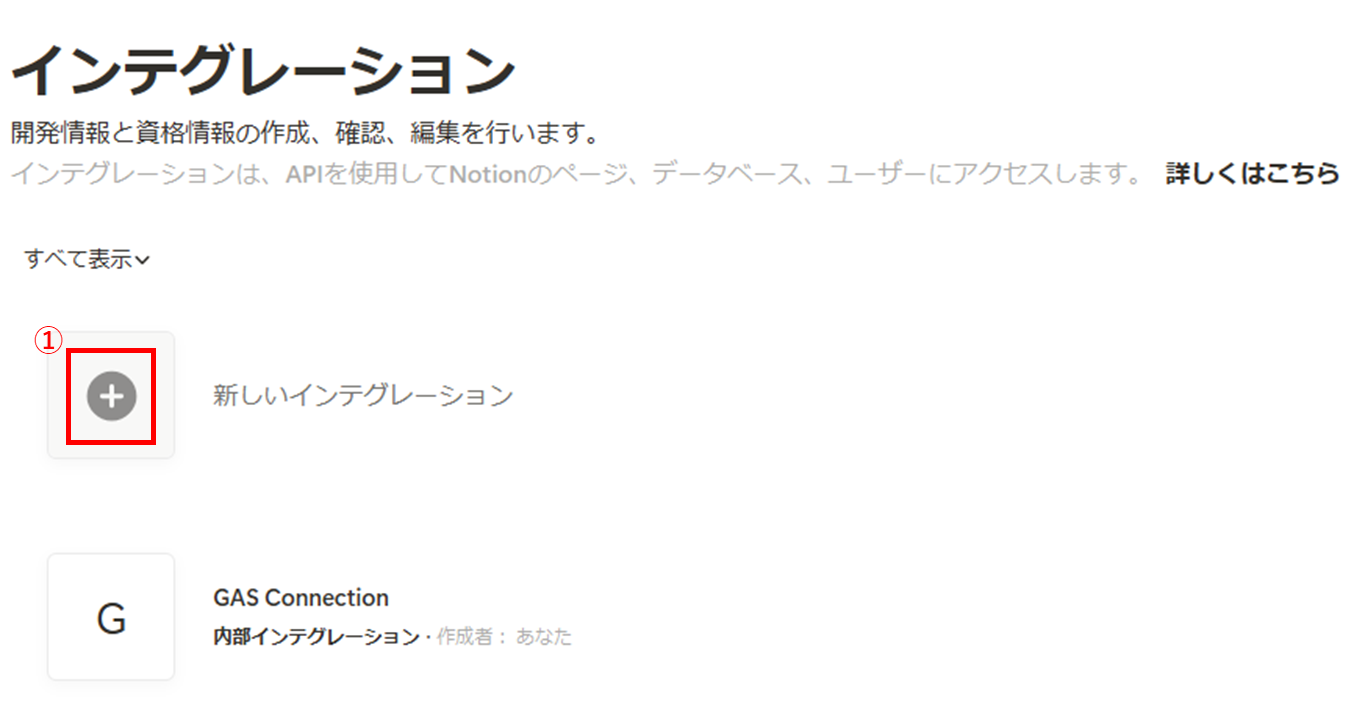

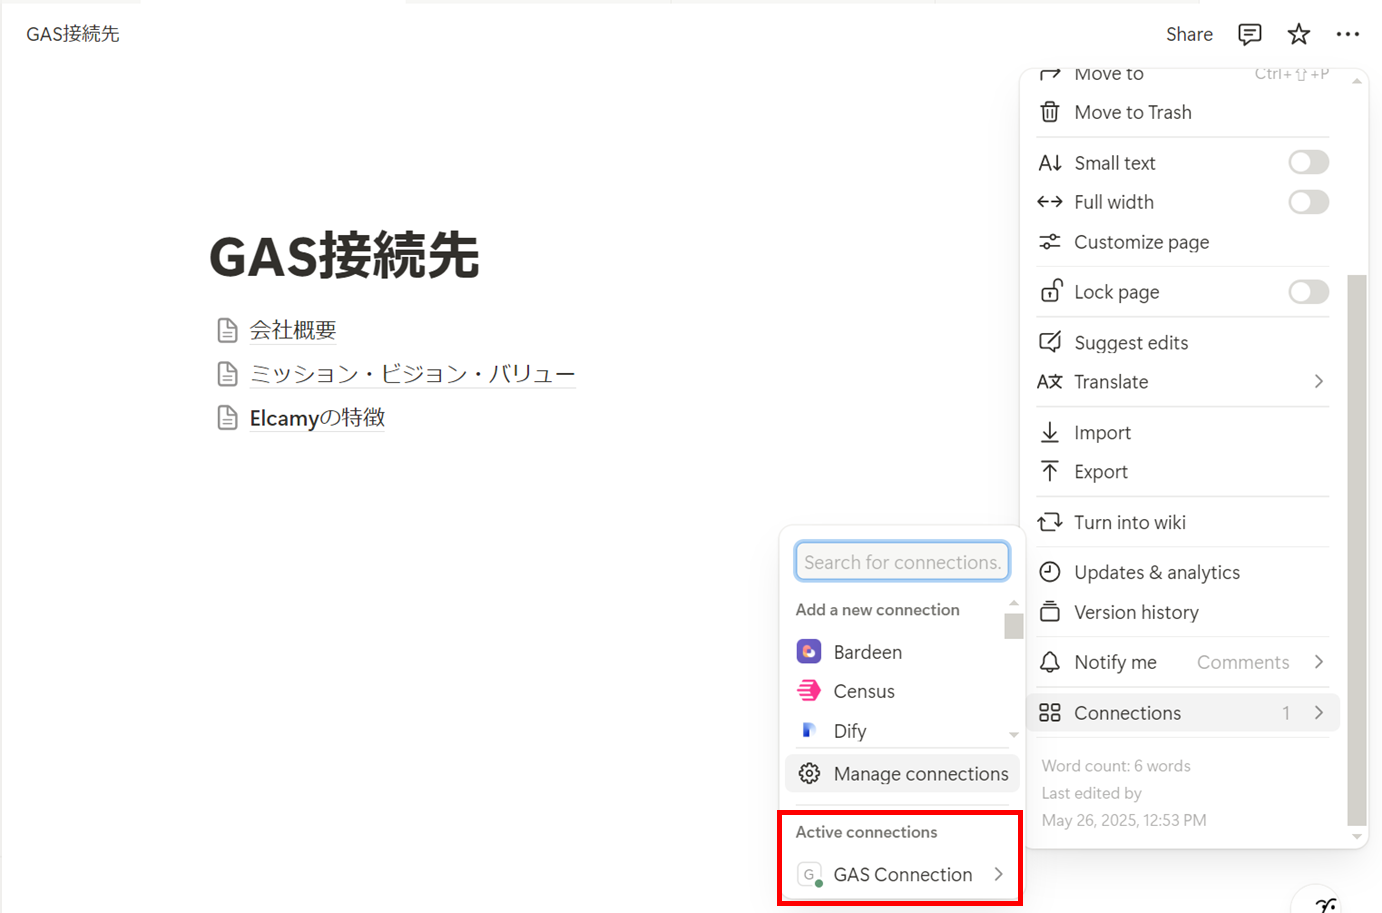
-
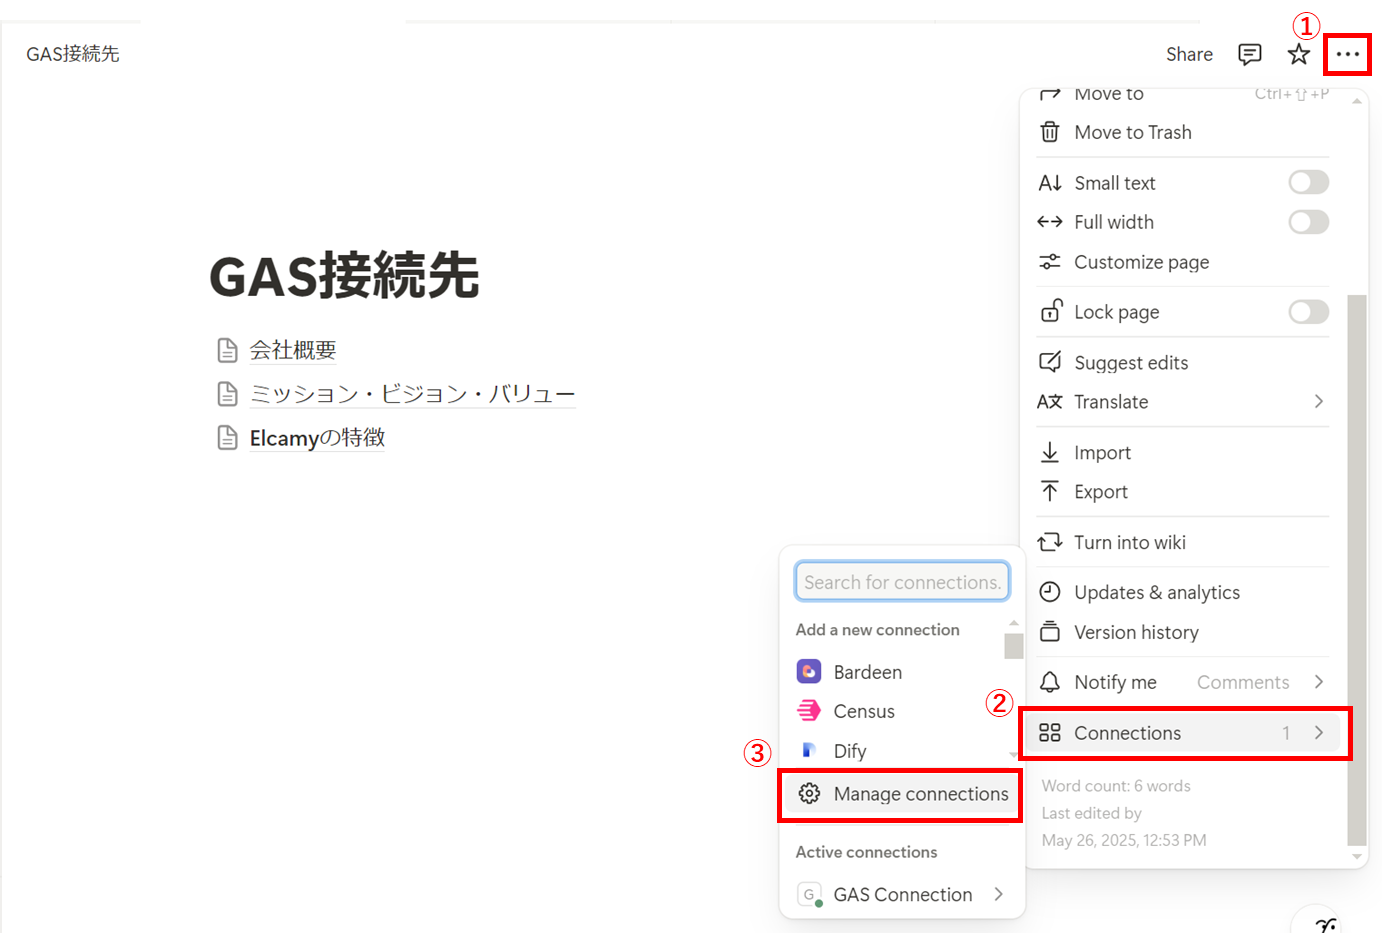
設定が完了すると、作成したインテグレーションが「Active connections」に表示されます。
Step 2:Notion 子ページのIDをCSVに保存
続いて、Notionの親ページの下にある子ページのIDを取得して、CSV形式でGoogle Driveに保存します。
今回は下記3つのGASのコードに分けています。
| ファイル名 | 内容 |
|---|---|
| common.gs | store_notion_id.gsとregister_dify_knowledge.gsに共通する設定や関数 |
| store_notion_id.gs | Notion APIを使ってNotionページIDを取得し、CSVファイルに保存する |
| register_dify_knowledge.gs | Notion APIを使ってNotionページのコンテンツを取得し、DifyナレッジAPIを使ってナレッジベースに登録する |
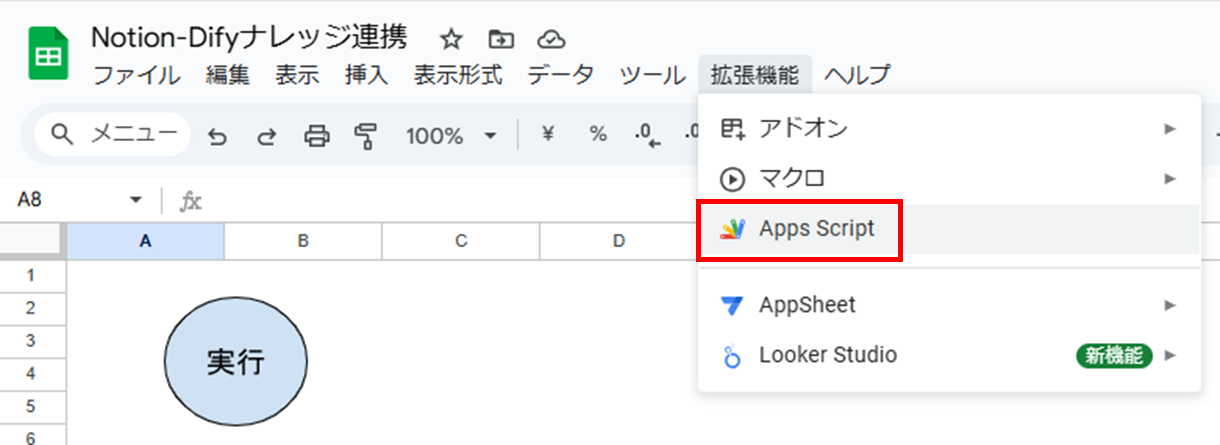
-
まず、スプレッドシートからApps Scriptを開きます。
-
次に、
common.gsにNotionの「内部インテグレーションシークレット」を記載します。common.gsconst NOTION_TOKEN = "*****"; // このケースではGAS Connectionからコピペ -
続いて、
store_notion_id.gsに必要な設定を記載します。store_notion_id.gs// store_notion_id.gsだけで使う変数 const PAGE_ID = "*****" // Notionページ「GAS接続先」のページID const FOLDER_ID = "*****" // CSVファイルを保存するフォルダのID // Notion子ページのIDを取得してCSVに保存する関数 // 1列目: NotionページID // 2列目: ページタイトル(Difyナレッジ登録に必要ではないが、IDとタイトルの対応を確認するために使用) function getChildPageIds() { const url = `https://api.notion.com/v1/blocks/${PAGE_ID}/children?page_size=100`; const options = { method: "get", headers: { "Authorization": `Bearer ${NOTION_TOKEN}`, "Notion-Version": "2022-06-28", "Content-Type": "application/json" } }; const response = UrlFetchApp.fetch(url, options); const json = JSON.parse(response.getContentText()); const pageIds = []; json.results.forEach(block => { if (block.type === "child_page") { pageIds.push({ id: block.id, title: block.child_page.title }); } }); saveAsCsv(pageIds); } // CSVに保存する関数 function saveAsCsv(data) { const csv = data.map(row => `"${row.id}","${row.title}"`).join("\n"); const folder = DriveApp.getFolderById(`${FOLDER_ID}`); const fileName = `notion_child_pages_${new Date().toISOString()}.csv`; folder.createFile(fileName, csv, MimeType.CSV); }PAGE_IDは、NotionページIDはURLに記載されている32桁の英数字です。
FOLDER_IDは、CSVファイルを保存するGoogle DriveフォルダのURLのdrive.google.com/drive/folders/に続く英数字です。-
NotionページID

https://www.notion.so/GAS-{NotionページID(32桁)}?pvs=4 -
Google DriveフォルダのID
https://drive.google.com/drive/folders/{Google DriveフォルダのID}
-
NotionページID
Step 3:Notionページからコンテンツを取得
次に、保存されたCSVからNotionページIDを読み込み、それぞれのページの中身を取得します。
先ほどのステップで取得したNotionページIDからコンテンツを取得する処理を register_dify_knowledge.gs に記載します。
-
まず、CSVファイルからNotionページのIDを取得します。
// (1) CSVファイルからIDリストを取得 function getPageIdsFromCsv() { const fileId = '*****'; // Googleドライブ上のCSVファイルID const file = DriveApp.getFileById(fileId); const csv = Utilities.parseCsv(file.getBlob().getDataAsString()); const ids = []; for (let i = 0; i < csv.length; i++) { // ヘッダなし ids.push(csv[i][0]); // 1列目にNotionのページIDがある前提 } return ids; }fileIdには、対象のCSVファイルのIDをベタ書きしています。
このIDはCSVファイルのURLのdrive.google.com/file/d/に続く英数字です。-
CSVファイルのID
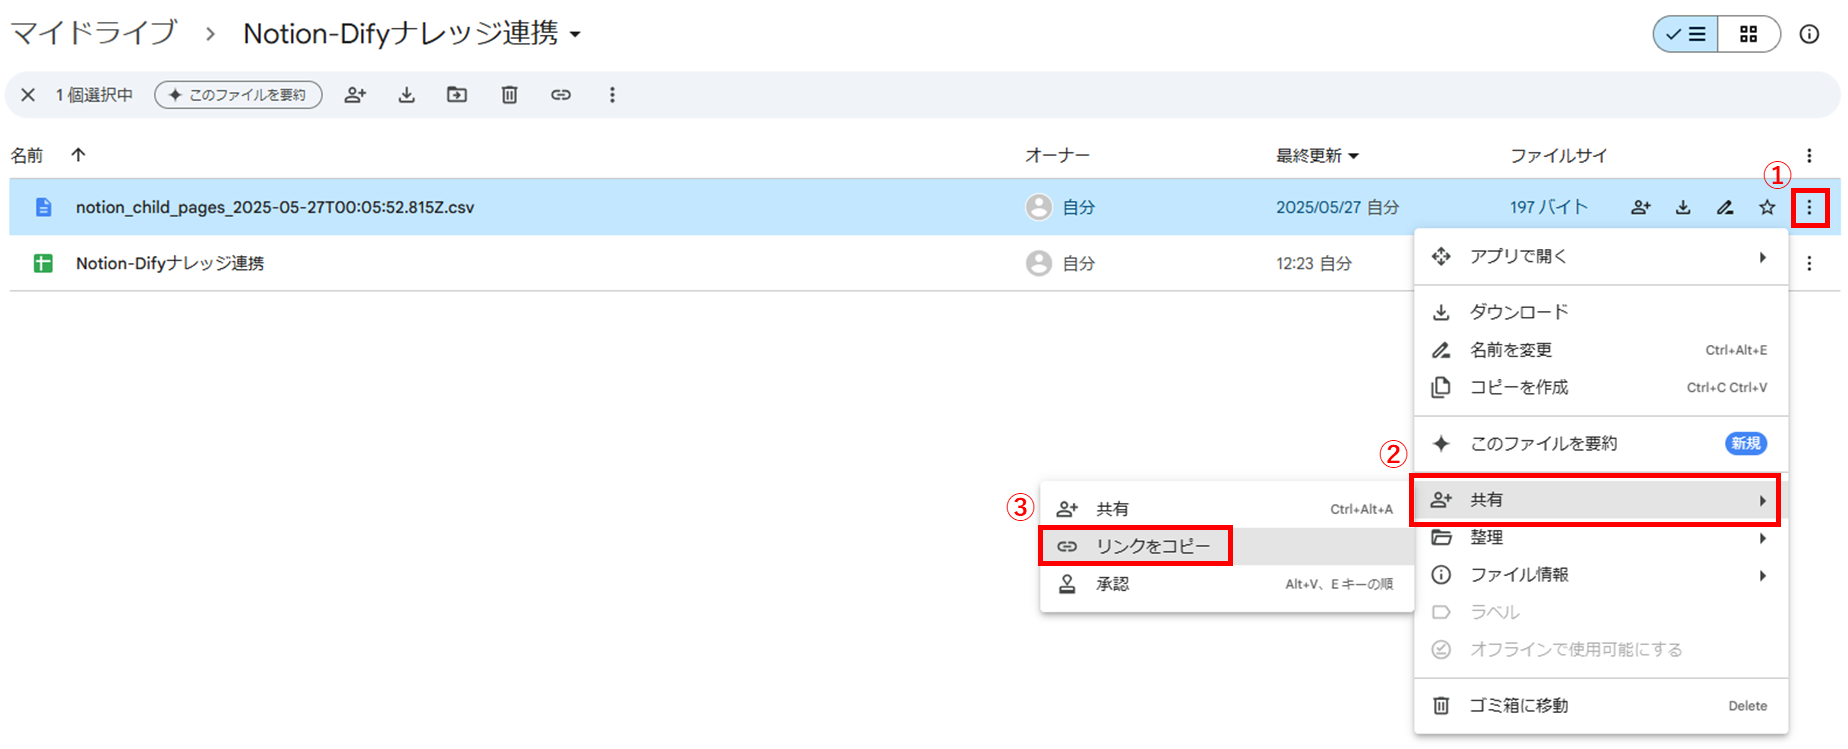
https://drive.google.com/file/d/{CSVファイルのID}/view?usp=drive_link
-
CSVファイルのID
-
NotionページIDに対応するコンテンツを取得する処理を記載しています。
今回は以下のブロックタイプのコンテンツを対象とします。
- paragraph
- heading_1, heading_2, heading_3
- bulleted_list_item, numbered_list_item
// (2) Notion APIで本文取得 function fetchNotionPageContent(pageId) { const url = `https://api.notion.com/v1/blocks/${pageId}/children`; const options = { method: 'get', headers: { 'Authorization': `Bearer ${NOTION_TOKEN}`, 'Notion-Version': '2022-06-28' } }; const response = UrlFetchApp.fetch(url, options); const data = JSON.parse(response.getContentText()); const target_blocktypes = [ "paragraph", "heading_1", "heading_2", "heading_3", "bulleted_list_item", "numbered_list_item" ] let textContent = ''; for (const block of data.results) { if (!target_blocktypes.includes(block.type)) { continue; // 対象外はスキップ } // 各タイプごとにrich_text配列を取り出す let richTexts = []; switch(block.type) { case "paragraph": if (block.paragraph && block.paragraph.rich_text) { richTexts = block.paragraph.rich_text; } break; case "heading_1": case "heading_2": case "heading_3": if (block[block.type] && block[block.type].rich_text) { richTexts = block[block.type].rich_text; } break; case "bulleted_list_item": case "numbered_list_item": if (block[block.type] && block[block.type].rich_text) { richTexts = block[block.type].rich_text; } break; } // richTextsが空でなければテキストを抽出 if (richTexts.length > 0) { textContent += richTexts.map(t => t.plain_text).join('') + '\n'; } } Logger.log(textContent); return textContent; }
Step 4:Difyナレッジに登録
最後は、DifyのAPIを使って、Notionのテキストをナレッジベースに登録します。
NotionページのコンテンツをページごとにDifyナレッジベースに登録する処理をregister_dify_knowledge.gs に記載します。
今後、Notionページごとに更新や削除などができるよう、Difyナレッジのタイトル(ファイル名)はNotionページIDとします。
-
まず、GASからDifyナレッジベースに接続するために必要な情報を
register_dify_knowledge.gsに記載します。-
DifyナレッジAPIキー
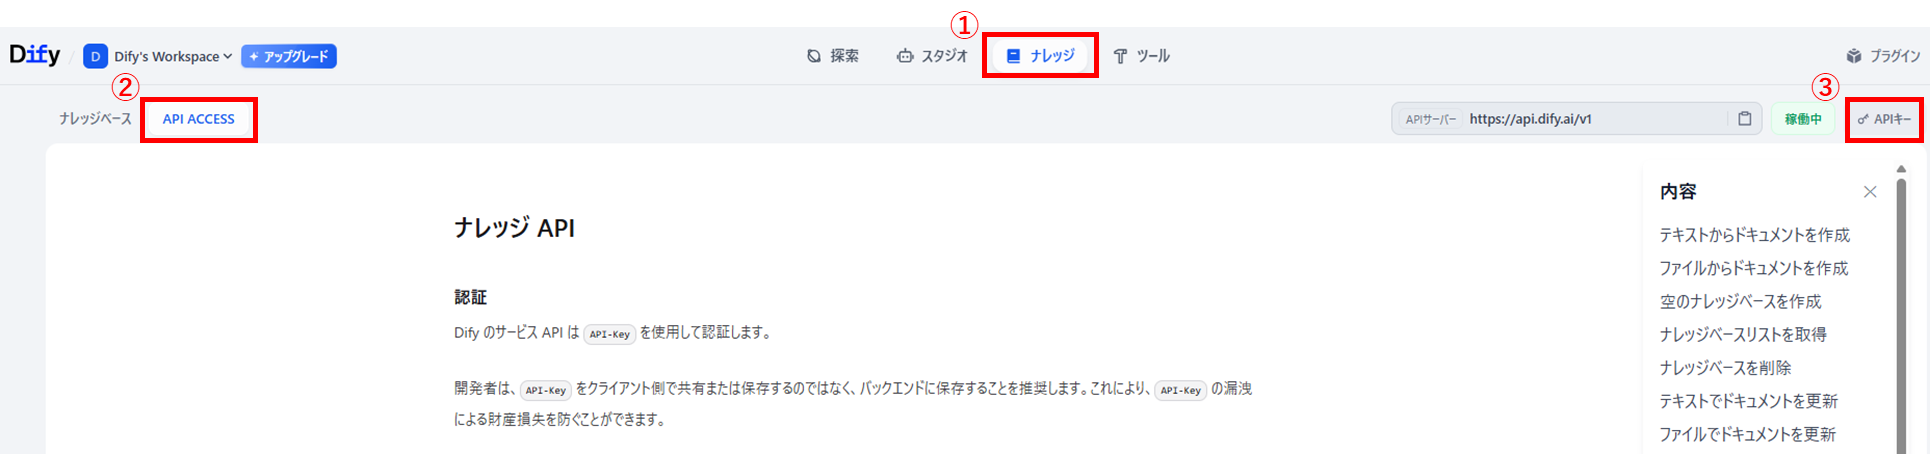
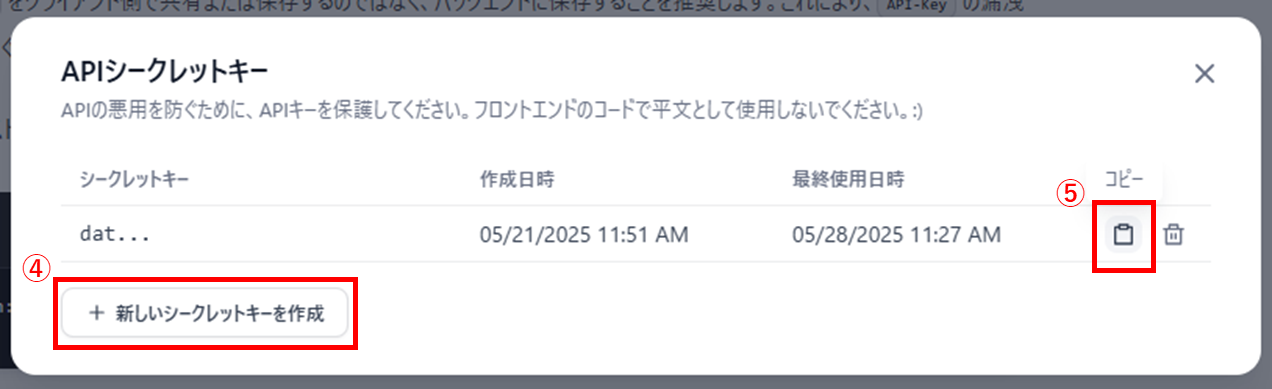
-
DifyナレッジベースID
ナレッジベースのURLの
cloud.dify.ai/datasets/に続く英数字です。https://cloud.dify.ai/datasets/{ナレッジベースID}/documents -
register_dify_knowledge.gs// register_dify_knowledge.gsだけで使う変数 const DIFY_KNOWLEDGE_TOKEN = 'dataset-*****'; // DifyナレッジAPIキー const DIFY_KNOWLEDGE_ID = '*****'; // DifyナレッジベースID
-
DifyナレッジAPIキー
-
次に、DifyナレッジにNotionページのコンテンツを登録する処理を記載します。
// (3) Difyナレッジに登録 function uploadToDifyKnowledge(title, content) { const url = `https://api.dify.ai/v1/datasets/${DIFY_KNOWLEDGE_ID}/document/create_by_text`; const options = { method: 'post', contentType: 'application/json', headers: { 'Authorization': `Bearer ${DIFY_KNOWLEDGE_TOKEN}` }, payload: JSON.stringify({ name: title, text: content, indexing_technique: 'high_quality', process_rule: {"mode": "automatic"} }) }; const response = UrlFetchApp.fetch(url, options); }
GASの全体像
common.gs
const NOTION_TOKEN = "*****"; // Notionの内部インテグレーションシークレット
// メイン(スプレッドシートで実行ボタンに割り当てる関数)
function main() {
getChildPageIds();
syncNotionPagesToDify();
}
store_notion_id.gs
// store_notion_id.gsだけで使う変数
const PAGE_ID = "*****" // Notionページ「GAS接続先」のページID
const FOLDER_ID = "*****" // CSVファイルを保存するフォルダのID

// Notion子ページのIDを取得してCSVに保存する関数
// 1列目: NotionページID
// 2列目: ページタイトル(Difyナレッジ登録に必要ではないが、IDとタイトルの対応を確認するために使用)
function getChildPageIds() {
  const url = `https://api.notion.com/v1/blocks/${PAGE_ID}/children?page_size=100`;

  const options = {
    method: "get",
    headers: {
      "Authorization": `Bearer ${NOTION_TOKEN}`,
      "Notion-Version": "2022-06-28",
      "Content-Type": "application/json"
    }
  };

  const response = UrlFetchApp.fetch(url, options);
  const json = JSON.parse(response.getContentText());

  const pageIds = [];

  json.results.forEach(block => {
    if (block.type === "child_page") {
      pageIds.push({
        id: block.id,
        title: block.child_page.title
      });
    }
  });

  saveAsCsv(pageIds);
}

// CSVに保存する関数
function saveAsCsv(data) {
  const csv = data.map(row => `"${row.id}","${row.title}"`).join("\n");
  const folder = DriveApp.getFolderById(`${FOLDER_ID}`);
  const fileName = `notion_child_pages_${new Date().toISOString()}.csv`;

  folder.createFile(fileName, csv, MimeType.CSV);
}
register_dify_knowledge.gs
// register_dify_knowledge.gsだけで使う変数
const DIFY_KNOWLEDGE_TOKEN = 'dataset-*****'; // DifyナレッジAPIキー
const DIFY_KNOWLEDGE_ID = '*****'; // DifyナレッジベースID
// (1) CSVファイルからIDリストを取得
function getPageIdsFromCsv() {
  const fileId = '*****'; // Googleドライブ上のCSVファイルID
  const file = DriveApp.getFileById(fileId);
  const csv = Utilities.parseCsv(file.getBlob().getDataAsString());

  const ids = [];
  for (let i = 0; i < csv.length; i++) { // ヘッダなし
    ids.push(csv[i][0]); // 1列目にNotionのページIDがある前提
  }
  return ids;
}
// (2) Notion APIで本文取得
function fetchNotionPageContent(pageId) {
  const url = `https://api.notion.com/v1/blocks/${pageId}/children`;
  const options = {
    method: 'get',
    headers: {
      'Authorization': `Bearer ${NOTION_TOKEN}`,
      'Notion-Version': '2022-06-28'
    }
  };

  const response = UrlFetchApp.fetch(url, options);
  const data = JSON.parse(response.getContentText());

  const target_blocktypes = [
    "paragraph",
    "heading_1",
    "heading_2",
    "heading_3",
    "bulleted_list_item",
    "numbered_list_item"
    ]
  let textContent = '';
  for (const block of data.results) {
    if (!target_blocktypes.includes(block.type)) {
      continue;  // 対象外はスキップ
    }

    // 各タイプごとにrich_text配列を取り出す
    let richTexts = [];

    switch(block.type) {
      case "paragraph":
        if (block.paragraph && block.paragraph.rich_text) {
          richTexts = block.paragraph.rich_text;
        }
        break;

      case "heading_1":
      case "heading_2":
      case "heading_3":
        if (block[block.type] && block[block.type].rich_text) {
          richTexts = block[block.type].rich_text;
        }
        break;

      case "bulleted_list_item":
      case "numbered_list_item":
        if (block[block.type] && block[block.type].rich_text) {
          richTexts = block[block.type].rich_text;
        }
        break;
    }

    // richTextsが空でなければテキストを抽出
    if (richTexts.length > 0) {
      textContent += richTexts.map(t => t.plain_text).join('') + '\n';
    }
  }
  Logger.log(textContent);
  return textContent;
}
// (3) Difyナレッジに登録
function uploadToDifyKnowledge(title, content) {
  const url = `https://api.dify.ai/v1/datasets/${DIFY_KNOWLEDGE_ID}/document/create_by_text`;
  const options = {
    method: 'post',
    contentType: 'application/json',
    headers: {
      'Authorization': `Bearer ${DIFY_KNOWLEDGE_TOKEN}`
    },
    payload: JSON.stringify({
      name: title,
      text: content,
      indexing_technique: 'high_quality',
      process_rule: {"mode": "automatic"}
    })
  };

  const response = UrlFetchApp.fetch(url, options);
}
// 全体処理
function syncNotionPagesToDify() {
const ids = getPageIdsFromCsv();
for (const id of ids) {
try {
const content = fetchNotionPageContent(id);
const title = `${id}`; // タイトルはNotionIDと一致させる
uploadToDifyKnowledge(title, content);
} catch (e) {
Logger.log(`Error with ID ${id}: ${e}`);
}
}
}
実行結果
準備
-
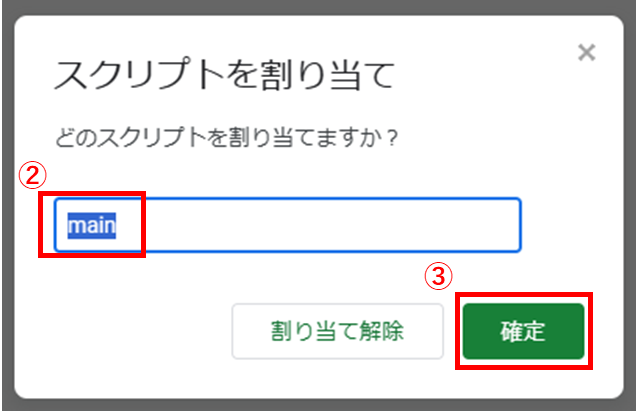
スプレッドシートに実行ボタンを作成して、実行する関数として
mainを割り当てます。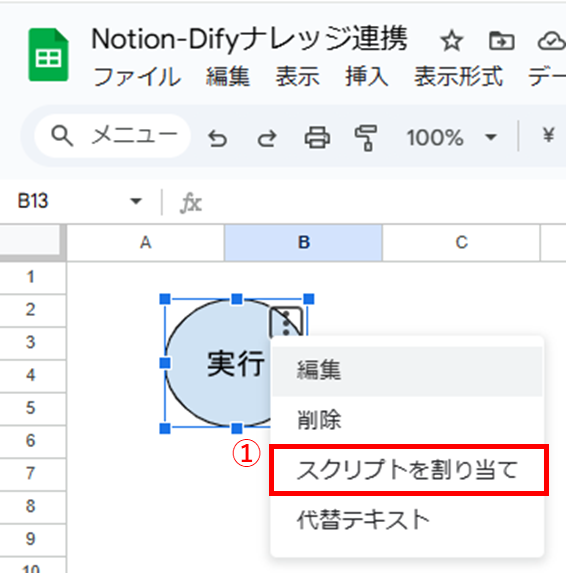
-
実行ボタンを押すと、Notion子ページIDを取得してからNotionコンテンツをDifyナレッジに登録するまでの一連の流れが実行されます。
その結果として、以下が作成されます。
-
Notion子ページIDを保存したCSVファイル(Google Driveフォルダ)
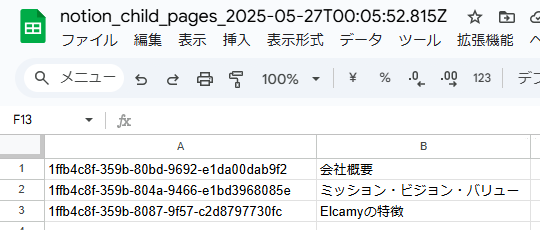
-
Difyナレッジベース

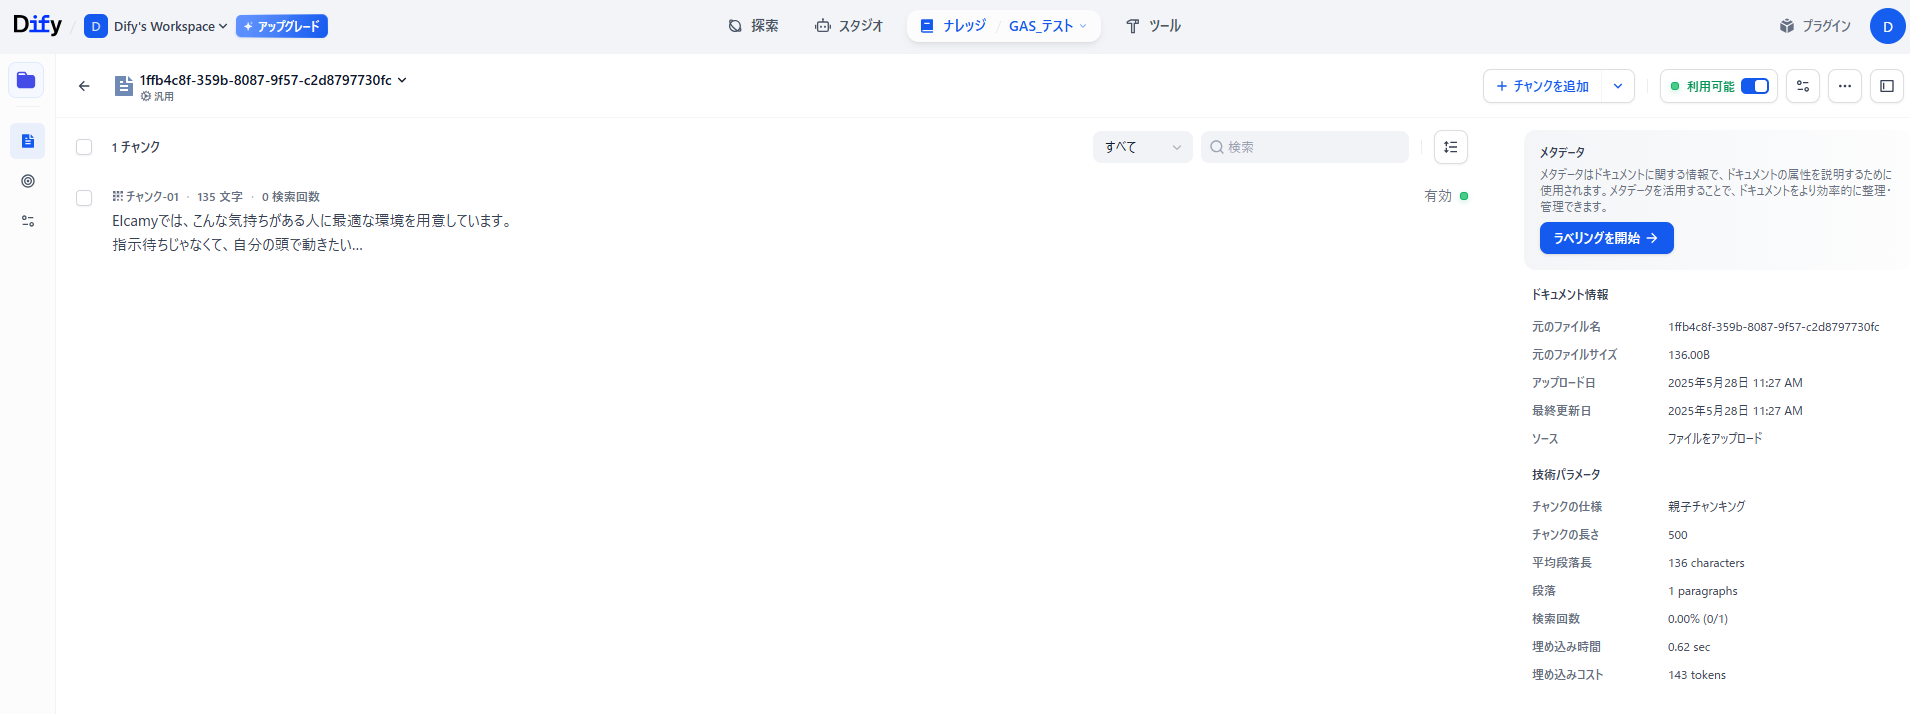
-
Notion子ページIDを保存したCSVファイル(Google Driveフォルダ)
おわりに
この記事では、Notionを使ってNotionページのコンテンツを、GASを使ってDifyのナレッジに登録する方法を紹介しました。
今回は、NotionページのコンテンツをDifyナレッジベースに登録するだけの処理を扱いましたが、次のようなカスタマイズが可能です。
- 「毎日●時」や「毎週▲曜日●時」など定期実行する
- Notionの子ページ・子データベースを指定の階層までコンテンツとして取得する
- CSVファイルにNotionページの最終更新日時を追加して、前回登録時から更新があったNotionページに対応するDifyナレッジベースだけを更新する
- 不要なCSVファイルを削除する
「Notionを使っているが、LLMとの連携が上手くできない」「Difyのナレッジを更新する手間を省きたい」などお困りごとがあれば、ぜひ1度ご相談を頂ければと思います。
参考

